Thursday, May 20, 2010

Oracle Middleware BPM/SOA Installation (windows)

  • Remove unused Oracle Service from Windows: SC DELETE <Service_Name> // example: [SC delete OracleXEClrAgent]
  • Edit - Windows Advance Environment Variable: $ control sysdm.cpl (when windows not letting us open through GUI interface)
  1. Depending on your environment download software from Oracle Site to your archive directory, I use "C:\CCC\BPM" and extract them appropriately following below steps.
  2. Install Database: C:/Oracle/11GR2
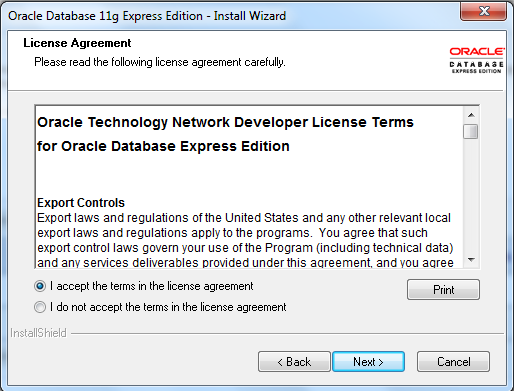
    1. Download Oracle Express 11GR2 Unzip the download and run the DISK1/setup.exe.
      1. C:\CCC\Downloads\OracleXE112_Win32\DISK1>setup.exe


      2. Provide password as "Pa$$w0rd123" for SYS /SYSTEM user for XE Database.


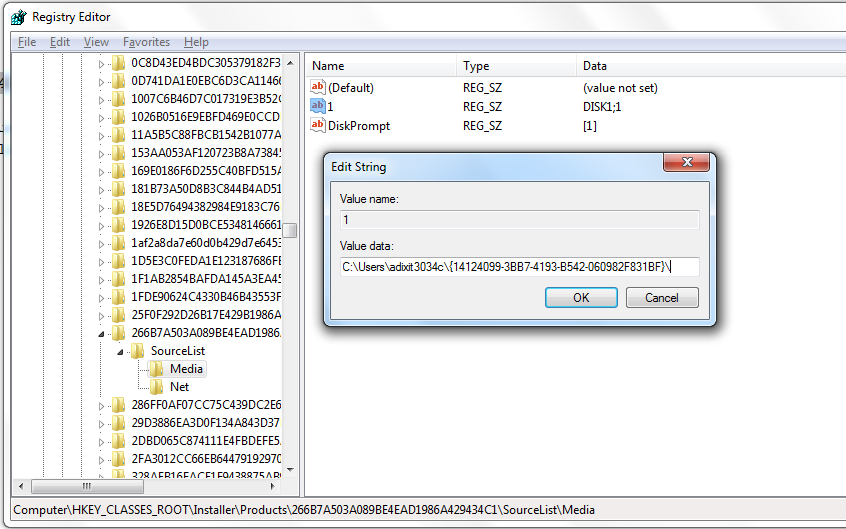
      3. Wait for Registry Editor Exception pop up from database installation, workaround is to Open Registry Editor : > Run > regedit.
        1. You need to locate this folder : HKEY_CLASSES_ROOT → Installer → Products → 266B7A503.... → SourceList → Media
        2. Update Edit Setting for 1 value as "C:\Users\adixit3034c\{14124099-3BB7-4193-B542-060982F831BF}\KEY_XE.reg".
      4. Save changes and complete installation.
    2. Oracle XE 11.2 Win 32 : note this is only good for Windows * 32 bit system.
      1. Once you are done with Installation of Oracle XE, you must update database parameters. Set the processes parameter to >=500 using the following instructions.
      2. CONN[ECT] [{logon | / | proxy} [AS {SYSOPER | SYSDBA}]] where
        1. logon has the syntax: username[/password] [@connect_identifier]
        2. proxy has the syntax: proxy user[username] [/password] [@connect_identifier]
      3. Login to sqlplus & run following commands(SQLPLUS SYS AS SYSDBA)
        1. SQL> show parameter session
        2. SQL> show parameter processes
        3. SQL> alter system reset sessions scope=spfile sid='*';
        4. SQL> alter system set processes=500 scope=spfile;
        5. SQL> shutdown immediate
        6. SQL> startup
        7. SQL> show parameter session
        8. SQL>show parameter processes
    3. Oracle 11G R2 Database - Win 64: 
      1. If Screen disappear after selecting Desktop class as system class, you have following 2 options:
        1. setup -jreLoc C:\YYY\java\jdk1.6.0_45
        2. if above one does not work then while installing DB select only install database only and then create a database :)
    4. To start / stop oracle database in windows: start / stop following services ['Control Panel' > 'Administrative Tools' > 'Services'] or can use command $ net start <Service_Name>
    5. Use command ($ lsnrctl status) to check status.
  3. Schema Configuration: RCU 
    1. Unzip and navigate to RCUHome/bin and open a command window and run rcu.bat.
      1. Note: If you want to use Oracle XE as your database, you need to set the RCU_JDBC_TRIM_BLOCKS environment variable to true*prior* to running RCU.
    2. The BAT file return to command prompt immediately and after a few seconds 'Repository Creation Utility Opens' ( if you just ran the utility to drop the schema , it open second time comparatively quickly)
    3. Fill the fields according to your environment:
      1. Database type: Oracle
      2. Host Name: LocalHost
      3. Port: 1521
      4. Service Name: XE
      5. Username: SYS
      6. Password: Pa$$w0rd
      7. Role: SYSDBA
    4. Select Components from RCU that you want to install, we will target MDS for metadata and all SOA/ BPM Components.
    5. When prompted i give same password for all Schema and move next.
    6. Click Next.
    7. Click on create to create tablespace, this takes around 2 mins and after completion will display summary page as below:
    8. Close the Window, this step created Schema required for Metadata & SOA / BPM.
  4. Weblogic Installation: C:/Oracle/Middleware (WLS1036_Generic.jar * 64 bit)
  5. Installing SOA BPM Suite:
    1. Once the database is configured, and WebLogic is installed now you can now install the SOA server into the Oracle Home on the WebLogic server. Extract  ofm_soa_generic_11.1.1.7.0_disk1_1of2.zip, ofm_soa_generic_11.1.1.7.0_disk1_2of2.zip at C:\Pradeep\OracleDownloads (this can be any path where you want to extract these zip files)
    2. execute: setup.exe -jreLoc C:\YYY\java\jdk1.6.0_45
    3. Wait for installation to finish, it will take a few minutes, in the end click on Finish. 
  6. Install JDeveloper: C:/Oracle/JDev
    1. Once installation is complete open Jdeveloper and follow below steps:
      1. Select > Help > Check for updates, click on Next.
      2. Select search update centers and select oracle fusion middleware products.
      3. Click on next. The system will search the update center for extensions.
      4. Select all SOA and BPM Updates.
      5. Restart the JDeveloper.
  7. Domain Creation:
    1. This step describes detail for configuring the weblogic server domain for the SOA Server.
    2. In the command window enter: $ MiddlewareHome/Oracle_SOA1/common/bin/config.sh
    3. Name Domain Name (base_domain):
    4. domain username and password: weblogic / weblogic123
    5. Update schema credentials: in our case all schema have same passwords:
    6. Select Admin Server and fill Admin server details and click next.

    7. When the configuration wizard's welcome screen comes up, select create a new weblogic domain and then click on next.
    8. Memory Setting: (Important otherwise domain won't come up):
      1. Update: C:\Oracle\Middleware\user_projects\domains\base_domain\bin\setSOADomainEnv.cmd
        1. [set DEFAULT_MEM_ARGS=-Xms512m –Xmx718m]
                  %%%%%%%%%%%%%%%%%%%%%%%%%%%%%%%%%%%%%%%%%%%
                                                     Completed SOA & BPM Installation

Monday, March 1, 2010

JAX-RS RESTful Web Service - Jersey

Web Services: A software system designed to support Interoperable machine to machine interaction.

SOAP Web Service: SOAP/XML-Based Web Services

  • Complex
  • Exchange Bloat

Restful Web Services (A SOAP Alternative)Why?

  • Still language / platorm independent = interoperability
  • Simpler / Easier - based on well known Web paradigm
    • Bring back the "Web" in Web services.
  • Can be more concise
    • Clients can choose their data format (XML, XHTML, JSON, etc)
  • Cacheable results (WWW paradigm).

SOA vs other-OAs
Comparisions to SOAP-based Web Services may be inappropriate. Both address particular needs.
> SOAP based Web Services are SOA.
> SOA in WS-* form
> An architecture loaded by standards.
> Restful Web Service are REST or Web Oriented Architecture.
> ROA or WOA
> An architecture style
> WOA = SOA + REST + WWW
> Web sites for machines vs Web Sites for humans.

REST = Representation State Transfer
> Term and idea introduced in 2000 in Phd dissertation by Roy Fielding.
> Fielding was a coauthor of HTTP
> Co-founder of Apache HTTP Server project.
> REST concepts originated with WWW and pre-date SOAP Web Services.

Resources:
> At the heart of REST is the concept of a Resource.
> A resource is a thing - anything you can conceive.
> Any coherent and meaningful concept
> You, me , all of us
> An account
> An order
> A stock
> A health record
> A hotel reservation
> book.

Resource = Noun:
RESTful Web Service developers are fond of suggesting resources are typically expressed by nouns.

Representation:
> A representation is a document that captures the current state of a resource.
> For example, an HTML Web page document with information (state) about a book you are interested in.
> So REST is about the transfer (request and response) of respresentation of resources.

URI:
> Each resource must be identified.
> Uniform Resource Identifier (URIs) are used to identify resources.
> More specifically, URL's are used in Web-based REST systems.
> They identify where and what resource is available.
>  http://www.sonianu.com/students/jamesbond


The WWW and REST
> So you are already use REST today!
> When you are browsing the WWW, you request the representation of a resource state via URL
> Resource state like:
> Stock prices for stocks.
> Cost / availability of a room.
> Course catalog from a school
> Typically , you (or more precisely your browser) asks for the representation in the form of 
> HTML
> Images
> Other MIME types


Representation Formats:
> While humans are intersted in browser understood and displayable representations , machines are not.
> Machines are more typically intersted in more structred document representations of resources.
> XML
> HTML
> JavaScript Object Notation (JSON)
> Could even be SOAP (but not usually)
> The type of format of requested representation is often suggested in the REST request URL, eg: http://www.sonianu.com/students/jamesbond/json


REST Verbs:
> When doming Web-based REST, HTTP methods are used to identify what you want done with /to the resource state.
> GET: the most common , suggest the client would like to receive the latest representation of the resource state.
> POST: provides the state for the creation of a new resource
> Typically, the state data is provided in the body of the HTTP POST requst message.
> DELETE: requests the removal of a resource.
> PUT: provides the new state for the update of a resource's state.
> Again, typically , state data is also provided in the body of the HTTP PUT request message.
> RESTful developers akin the HTTP methods to the verbs acting on the nouns (resources).


Some REST Examples
Stock Quote Fetch (XML)
http://ws.cdyne.com/delayedstockquote/delayedstockquote.asmx?GetQuote&StockSymbol=MMM&LicenseKey=0
http://ws.cdyne.com/delayedstockquote/delayedstockquote.asmx?op=GetQuote
GeoName-Country Data fetch
XML: http://ws.geonames.org/countryInfo?country=us
JSON:http://ws.geonames.org/countryinfoJSON?country=us
CSG: http://api.geonames.org/countryInfoCSV?lang=EN&country=US&username=demo&style=full


RESTful Web Services in Java
> Implementaiton Options:
> Servlets
> Roll your own
> Restlet Open Source projects
> JAX-WS
> Was designed to process SOAP message
> Retrofitted to allow most of the SOAP message processing to be by passed. Consider a clumsy and inconvenient solution.
> JAX-RS
> It is relatively recent addition to the Java community. The final release of the specification (JAX-1.0) occourred in Oct 2008.
> JAX-RS maps URIs, HTTP methods and MIME content type negotiation to annotated POJOs.

Jersey:
> A with all Java specification, JAX-RS must be implemented.
> The jersey project (https://jersey.dev.java.net/) is Sun's reference implemenation of JAX-RS 1.0
> Jersey is already part of Glassfish
> Jersey (and by default the JAX-RS specification / API) are part of Java EE 6.
> Jersey is not , however , the only JAX-RS implementation.
> Resteasy is an implemetation of JAX-RS by JBoss.

Jersey Setup:
> As Jersey is not a part of most Java runtime environments at this time, you must first get Jersey and make it a part of your project.
> Download Jersey from http://jersey.dev.java.net/
> The Download includes several Jersey libraries (see the lib folder) to include the Jersey core, core server, Jersey Client, etc.
> Jersey is also dependent on many third party jars too like asm.jar ( a bytecode manipulation framework) and jettison.jar (API which read and write JSON).
> The required JAR files are all in the downloaded zip file.
> With Jersey added to your project, you must add the Jersey adapter Servlet to your web.xml file.
> The adapter servlet route REST traffic to the appropriate RESTful Web Service POJO/JavaBean.
> Open your application's web.xml file and add the following <servlet> element.
<servlet>
<servlet-name>JerseyAdapterServlet</servlet-name> <servlet-class>com.sun.jersey.spi.container.servlet.ServletContainer</servlet-class>
<init-param>
<param-name>com.sun.jersey.config.property.packages</param-name>
<param-value>com.test.resource</param-value>
</init-param>
<load-on-startup>1</load-on-startup>
</servlet>
> You must also add a <servlet-mapping> element to map the appropriately designated requests to the servlet and thus to the RESTful WebService beans.
> The URL pattern is up to you, however many developers choose the /resources/* pattern (as shown below) which aligns with the idea of requesting REST resources.
<servlet-mapping>
<servlet-name>JerseyAdapterServlet</servlet-name>
<servlet-class>/resources/*</url-pattern>
</servlet-mapping>
> An additional <init-params> element must also be added to the <servlet> element above.
> However, a better understanding of the RESTful services is needed before adding this element.
JAX-RS Services
> Using JAX-RS, REST resources are POJO.
> The POJOs are annotated with @Path
> @Path takes one argument, the argument identifies the relative request URL path to which the resource responds.
@Path("/helloworld")
public class HelloWorldResource{
...
}
> The @Path annotation and most annotation discussed here can be found in the jaxws.ws.rs package.

RESTful Service Path:
> The URI path to the RESTful POJO is relative to the base URI of the server, context root of the WAR, and the URL pattern for the Jersey adapter servlet.
http://<server>:<port>/<context>/<JerseyServletMapping>/<Path>
> So assuming the POJO was in a MyWebApp War, a URL request to this HelloWorldResource might look like following:
> http://localhost:8080/MyWebApp/resources/helloworld
> Paths are automatically encoded. So a @Path["/hello world"] is the same as @Path("/hello%20world").
> Paths may use wild cards and regular expressions to assist in mapping.

RESTful Operations
> Add annotations (@GET, @POST, @PUT, @DELETE, @HEAD) to the resource methods to indicate what should be invoked for each type of HTTP request.
@Path("/helloworld")
public class HelloWorldResource{
@GET
public String sayHello(){
return "Hello World";
}
}
> Methods that are annotated with @GET, @POST, @PUT, @DELETE and @HEAD are called resource methods.
> These methods must be declared public.
> if a resource methods returns void , the response to the client will be an empty HTTP method body with a 204 status code (request successfully processed).
> By default, the resources return text/plain, However, the @Produces annotation can be used to specify the MIME type of response.
> It can also be placed on the resource methods to overrid any class @Produces setting.

DEMO - RESTFUL DEMO - ECLIPSE

import javax.ws.rs.GET;
import javax.ws.rs.POST;
import javax.ws.rs.PATH;
import javax.ws.rs.PathParam;

@Path("/helloworld")
public class HelloWorldResource{
@GET
public String sayHello(){
return "Hello World";
}

@POST
@PATH("{msg}")
public String echoHello(@PathParam("msg") String message) {
return "You said: " + message;
}
}
Installed to Tomcat with Web.xml

@Path("/helloworld")
@Produces("text/html")
public class HelloWorldResource{
@GET @PATH("/text")
//@Produces("text/xml")
public String sayHello(){
return "Hello World";
}

@POST @PATH("{msg}")
@Produces("application/json")
public String echoHello(@PathParam("msg") String message) {

}
}


Representations:
> Resources may also be sent information (as part of the HTTP request body) by the client.
> The @Consumes annotation works in a fashion similar to @Produces but for incoming rather than outgoing MIME types.
> @Consumes specifies which MIME types can be accepted or consumed by the resources.
> Like @Produces , it can be specified on the class or method level (where it overrides the class annotation setting).
> if a resource is unable to consume the MIME type of a client request, the runtime sends back an HTTP 415 error (Unsupported Media Type).
@POST
@Consumes("text/plain")
public void respondToMessage(String message) {
...
}

Path Parameters:
> THe URL path may contain variables. The variables are substitued at runtime in order to provide the resource with additional information.
> Variable are denoted by curly braces in the @Path annotation @Path("/helloworld/{username}")
> Make sure servlet mapping takes into account any extra data passed via the URL parameters. <url-pattern>/resources/*</url-pattern>
> Without the "*" in the url-pattern, the additional data is interpreted as part of the URL causing the request to miss it's intended target resources.
> Regular expressions can be used in the variable declaration to constrain valid character data. @Path("/helloworld/{username:[A-Z][a-A-Z]}")
> In this example, the username must start with an uppercase character and then include any number/anycase of charactes after that.
> If an requset of the resource, the username provided in the URL does not match the regular expression template then a 404 (Not Found) error is the response.
> In other words, sending the wrong data is as good as if the resource is not there.
> If multiple variable are needed, seperate the curly braced variables with a "/". @Path("/helloworld/{firstName}/{lastName}")

Query String Parameters
> Query String parameters can be extraccted with the @QueryParam annotation.
> In a fashion to the use of @PathParam, use the @QueryParam annotation in front of any method parameter.
@Path("/helloworld")
public class HelloWorldResource {
@GET
@Produces("text/plain")
public String sayHello(QueryParam("username") String username) {
return "Hello "+ username;
}
}
> the method parameter will be set to the query string parameter by the same name. http://localhost:8080/MyWebApp/resources/helloworld?username=Anup

Other Parameters:
> In fact there are six type of parameter that you can extract data from using annotation.
> You have already seen path parameters and query parameters.
> In addition , you can extract data from form parameters, cookie parameters, header parameters and matrix parameters using the following annotations.
Parameter JAX-RS Annotation
HTML form parameter @FormParam
HTTP Header parameter @HeaderParam
HTTP Cookie parameter @CookieParam
Matrix URL parameter @MatrixParam


JAX_RS, JAXB and JSON
> The Java architecture for XML Binding (JAXB) allows Java objects to be marshaled and unmarshaled in/out of XML.
> It is used heavily in JAX-WS for SOAP-based Web Services.
> JAXB annotations can be used with JAX-RS to marshal and unmarshal your java types to XML for RESTful Web Services producing or using XML.
> For Eg, consider the following JAXB annotated type.
@XmlRootElement(name="student")
public class Student {
private int id;
private String name;
private String grade;
//getters and setters removed for brevity.
}
> In order to return JAXB produced XML documents of the Student type, simply have your RESTful service produce an instance of that type.
@Path("/students")
public class StudentResource{
@GET
@Produces("application/xml")
public Student getStudent(@QueryParam("id") int studentid) {
Studnet student = // work to retrieve Student object by id
return student;
}
}
> Likewise use any of the parameter annotations with a Student type parameter to have JAX-RS use JAXB to unmarshal XML data into object form.
<student>
<grade>A+</grade>
<id>1</id>
<name>Anup</name>
</student>

> In similar fashion , JAX-RS provides libraries to automatically marshal and unmarshal in JSON format (lighter than XML payload)!
> Just change the @Produces to "application/json" and magically JAX-RS provides the same data in JSON format.
@GET
@Produces("application/json")
public Student getStudent(@QueryParam("id") int studentid) {
Student student = // work to retrieve Student object by id 
return student;
}
> Some of the other JAX-RS implementations support additional representations.
> For example, Resteasy supports Atom.
> {"grade":"A+";"id":"12","name":"Anup"}


Resource Lifecycle:
> By default , ther JAX-RS environment creates an instance of the resource (the JAX-RS POJO) for each request.
> The resource can be configured for two other lifecycles.
> Use the @Singleton annotation on the resource to indicate a single instance should be reused for all resquests.
import com.sun.jersey.spi.resource.Singleton;
@Path("/helloworld")
@Singleton
public class HelloWorldResource {
...
}
> Use @PerSession to indicate that a new instance should be created and reused for each client session.
> It should be noted that these last two annotation are Jersey implementation are not definted in JAX_RS.
> Note the com.sun.jersey package names
import com.sun.jersey.spi.container.servlet.PerSession;
@Path("/helloworld")
@PerSession
public class HelloWorldResource {
...
}

JAX-RS Resource Deployment
> Once you have your JAX-RS resource constructed, you must inform the JAX-RS adapter servlet of your resource.
> There are several options for identifying resources.
> The simplest way is to provide an <init-param> to the Jersey Adapter Servlet.
> The init-param provides the adapter with a list of packages containing JAX-TS anntotated resources.

JAX-RS Clients:
> The JAX-RS specification does not specify how to build a client.
> In Java one could use existing client API such as java.net.URL, URLConnection or HTTPClient.
> Of course since REST operates simply over the web usring HTTP etc, a simple browser can be used to test RESTful service.
> However, many of the JAX-RS implementation provides a Client API.
> The Jersey JAX-RS implementatioon comes with a client API, here is a small sample application to call on the HelloWorldResource.
import javax.ws.rs.core.MultivaluedMap;
import com.sun.jersey.api.client.Client;
import com.sun.jersey.api.client.WebResource;
import com.sun.jersey.core.util.MultivaluedMapImpl;

public class StudentClient {
public static void main(String [] args) throws Exception  {
Client client = Client.create();
WebResource wr = client.resource("http://localhost:8080/MyWebApp/resources/helloworld");
MultivaluedMap qps = new MultivaluedMapImpl();
qps.add("username", "Anup");
String s = wr.queryParams(qps).get(String.class);

System.out.println("Your RESTful Response: "+ s);
}
}
> Jersey's Client Object is the main configuration point for building a RESTful web service client.
> WebResources as its name implies , represents the RESTful resource to the client.
> The client API comes replete with capability to pass all types of parameters and data in the body of the request message and to extract data from the resonse.
> Notice the Jersey packages, Again the client side API is not by specification.

Before Adopting REST - JAX-RS
No REST for the Weary:
> REST is not a standard. REST follows conventions.
> It uses well understood paradigms and standards of the Web (HTTP, URLs etc)
> Your REST may not be my REST.
> Assumes point-to-point communications.
> It is a client / server model.
> Doesn't support distributed computing model well.
> Generally speaking, it's bound to HTTP.
> Fielding's paper didn't say it had to be.
> Supporting WWW infrastructure makes it difficult to use else where.
> Not everyting fits well into GET/POST/... (CRUD) activity.
> REST "Verbs" don't always fit additional application semantics.
> Can be overcome, but not always clean.
> Asynchronous Activity - ???
> Client can send callback location
> Services provide drop ship location
> Transaction - ???
> Security - ???
> HTTPS anyone
> Service Descriptions and Registeries (a la WSDL and UDDI)
> WSDL - Clumsy - Web Service Descriptor Language.
> WADL - Web Application Description Language.


Ques 01: Can you address security in RESTful services?
Ans  01: Security: Since most RESTful Web services rely on HTTP, you can use HTTPS and/or existing HTTP mechanisms to secure your RESTful Web services.  By design, RESTful Web services are lighter-weight that their SOAP counterparts.  Therefore, the kinds of security standards that exist in WS-* specifications are formally available in RESTful settings.  Some RESTful advocates suggest RESTful Web services are actually more secure because they rely on the Internet’s existing security infrastructure

Ques 02: How is Jersey ( JAX_RS)  different than Servlet based REST mechanism like Restlet. I can see Jersey has AdapterServlet too? Is Jersey  based on Servlet too then?
Ans  02: Jersey is an JAX-RS implementation.  RESTlet is a way to provide RESTful services in Java, but it is not guided by any standard.  In JAX-RS, your RESTful resource services are implemented as annotated POJO’s.  In RESTlet, the resource service classes extend ServerResource so some consider this a bit of a burden and intrusive.
The RESTlet group does now have an extension package with allows implements the JAX-RS specification.  See here for more details.
Per part 2 of your question, yes a servlet does act as a controller to route traffic to the appropriate annotated Jersey resource service.  In that way, both RESTlet and Jersey are similar in their reliance of servlet technology.

Ques 03: What is the best way to supply the request=GetCapabilities for REST that one has in SOAP or WMS services to communicate meta-data of REST services?
Ans  03: Many RESTful advocates would say the "conventions" associated with RESTful services makes a capabilities listing unnecessary.  That is, the resource as noun and HTTP method as verb make the services very transparent and easy to work with.

Ques 04: Can we run a rest web service using https protocol?
Ans  04: Yes

Ques 05: How about Spring and REST?
Ans  05: As of Spring 3.0, Spring offers RESTful API, but it is not JAX-RS compliant.  See here for details.  In general, Spring makes use of the annotated MVC controllers to serve as RESTful resources.

Ques 06: Is there a way to override the HTTP return error and give more detail?
Ans  06: Yes – to some extent.  For how to modify the message returned from the Jersey implementation see https://jersey.dev.java.net/nonav/documentation/latest/user-guide.html#d4e410

Ques 07 : is there simple/lightweight authentication capabilities with restful web services?
Ans  07 : Per #1, again nothing formal is provided, but there are some 3rd party packages sprouting up and all the standard Web authentication mechanisms could be used.

README & SOURCE

Sunday, October 4, 2009

Shared SSH Keys

Shared Keys add an additional security level to using SSH and if you choose not to use a password you can automate logging in via SSH. It also allows you to completely negate brute force password cracking attempts if you disable password authentication.

This tutorial assumes a basic knowledge of the Linux Command Line. The tutorial is written for Centos 5.X but is applicable to other distributions, although file locations may be slightly different. The tutorial is targeted at Mac and Linux users.

What are shared keys?
Shared Keys consist of a Public and Private key and allow a remote machine to authenticate a machine trying to connect it. The Private key resides on your machine and is used to identify you against the public key which resides on the machine you are trying to login to. You might think of it as a handshake. The remote machine has a description of what to expect from the handshake. It is unique to the client machine so if the handshake doesn't match then the authentication will fail.

Why use shared keys?
Shared keys have two main benefits. Firstly they allow you to turn off password authentication. Malicious bots regularly crawl the web trying to login to servers using SSH. They have large dictionaries of passwords and try to get into your server using brute force attacks. You can limit this by having a strong password and changing the port that you use to login to SSH with. You can also completely turn off password authentication if you use shared keys. Shared keys mean that no one can access your server without the shared key.

The second benefit is that if you use scripts to backup your server to another one you do not need passwords to run the scripts. The scripts can just use the shared keys to authenticate.

How to do it?
On my Mac I'm logged in as the user myuser. On the remote machine I also login using the user myuser. On my Mac I open Terminal (you'll find this in Applications > Utilities). First I need to generate the keys on my machine. I run this command:
$ ssh-keygen -t rsa

You will be prompted for a password. If you don't want a password just hit return. This means however that anyone who gets control of your machine will be able to login to your server. This generates a public and a private key in a hidden folder
$/users/myuser/.ssh

It is possible that you won't be able to see hidden files on your Mac by default. If this is the case you can enable this across your system by running the commands.
$ defaults write com.apple.finder AppleShowAllFiles TRUE 
$ killall Finder

Now on the remote machine login as your user using your normal password. In your home directory (/home/myuser in this example) create a new folder and then a file to hold your authorized keys.
$ mkdir .ssh 
$ cd .ssh 
$ touch authorized_keys

Now we copy the public key to the server using the scp command. This transfers the file using SSH so is secure as no one can see it. You will be asked for your regular password.
$ scp ~/.ssh/id_rsa.pub myuser@remote_server_host_address_or_ip:~/

Now SSH into your remote server in the standard way and in your home directory (/home/myuser in this example) you will see the file id_rsa.pub. We want to import this into our list of authorized keys so on the remote machine run this command.
$ cat id_rsa.pub >> ~/.ssh/authorized_keys

This writes the contents of the key to our authorized keys list. Once you are done we want to clean things up and set permissions on the files to ensure that no one can else can use our key. On the remote machine:
$ rm id_rsa.pub 
$ chmod 700 ~/.ssh 
$ chmod 600 ~/.ssh/authorized_keys

On the local machine: File permissions on a user's /home/user/.ssh directory must be 700, and the /home/user/.ssh/authorized_keys must be 600. Meanwhile, it is essential that all files in each .ssh directory are owned by the user in whose home directory they reside. To change ownership recursively, you can:
$ chown -R username:username /home/username/.ssh
$ chmod 700 ~/.ssh 
$ chmod 600 ~/.ssh/id_rsa

If you have multiple users and need to do this for each of them, you can use this loop:
for SSHUSER in user1 user2 user3 user4 user5; do
  # Add the authorized_keys file if it doesn't already exist
  touch /home/$SSHUSER/.ssh/authorized_keys
  # Set its permissions
  chmod 600 /home/$SSHUSER/.ssh/authorized_keys
  # Set directory permissions
  chmod 700 /home/$SSHUSER/.ssh
  # Set ownership for everything
  chown -R $SSHUSER:$SSHUSER /home/$SSHUSER/.ssh
done;

You should now be set up to access your machine with your shared key. Login as normal and if all goes to plan you will be granted access with your key. You can debug logging in by adding the verbose flag to your SSH request.
$ ssh -v myuser@remote_server_host_address_or_ip

Once you are sure everything is ok you can now disable password logins for addtional security. On the remote machine you will need root access and run the following commands
$ vi /etc/ssh/sshd_config

Find the line:
$ PasswordAuthentication yes

Change this to no. Then hit escape : wq to save the file. Finally restart the sshd daemon:
$/etc/init.d/sshd restart

You will now only be able to login to your server using a shared key.

Saturday, June 27, 2009

RedHat / Centos Disable IPv6 Networking

Our policy and network configuration does not requires IPv6 support in RHEL / CentOS / Fedora Linux. How do I prevent the kernel module from loading at boot time and disable IPv6 networking?
You can easily prevent the kernel module from loading by updating the following two files:

  1. /etc/modprobe.conf - Kernel driver configuration file.
  2. /etc/sysconfig/network - RHEL / CentOS networking configuration file.

/etc/modprobe.conf
Edit /etc/modprobe.conf, enter:
# vi /etc/modprobe.conf

Append the following line:
install ipv6 /bin/true
Save and close the file.

/etc/sysconfig/network
Edit /etc/sysconfig/network, enter:
# vi /etc/sysconfig/network

Update / add as follows:
NETWORKING_IPV6=no
IPV6INIT=no

Save and close the file. Restart networking service
# service network restart
# rmmod ipv6

Alternatively, simple reboot the box:
# reboot

Verify IPv6 is disabled, enter:
# lsmod | grep ipv6
# /sbin/ifconfig

J A V A in L I N U X

Download the JDK from Oracle. The latest version as of now is Java SE 7u51.

I'm on 64-bit machine, therefore I downloaded jdk-7u51-linux-x64.tar.gz

It's easy to get the tar.gz package as we just have to extract the JDK, I usually extract the JDK to /usr/lib/jvm directory.
cd /usr/lib/jvm/
sudo tar -xf ~/Software/jdk-7u51-linux-x64.tar.gz
sudo update-alternatives --install "/usr/bin/javac" "javac" "/usr/lib/jvm/jdk1.7.0_51/bin/javac" 1
sudo update-alternatives --install "/usr/bin/java" "java" "/usr/lib/jvm/jdk1.7.0_51/bin/java" 1
sudo update-alternatives --install "/usr/lib/mozilla/plugins/libjavaplugin.so" "mozilla-javaplugin.so" "/usr/lib/jvm/jdk1.7.0_51/jre/lib/amd64/libnpjp2.so" 1
sudo update-alternatives --install "/usr/bin/javaws" "javaws" "/usr/lib/jvm/jdk1.7.0_51/bin/javaws" 1

After installing, we should configure each alternative
sudo update-alternatives --config javac
sudo update-alternatives --config java
sudo update-alternatives --config mozilla-javaplugin.so
sudo update-alternatives --config javaws

Now we can configure JAVA_HOME. We can edit ~/.bashrc and add following.
export JAVA_HOME=/usr/lib/jvm/jdk1.7.0_51/

Download Oracle JDK on Linux:
$ wget --header "Cookie: oraclelicense=accept-securebackup-cookie" http://download.oracle.com/otn-pub/java/jdk/8u5-b13/jdk-8u5-linux-x64.tar.gz --no-check-certificate
$ mv jdk-8u5-linux-x64.tar.gz?AuthParam=1399837157_13a216ce71be82d57322314c7d258f1a jdk-8u5-linux-x64.tar.gz

# it will create a directory('jdk1.8.0_05/') under default.
$ tar -zxf jdk-8u5-linux-x64.tar.gz -C /usr/java

# this will change the last modified date of directory recursively
$ find /usr/java/jdk1.8.0_05 -exec touch -t 201103161212.33 {} \;

# this will give randam date
$ find /home -exec touch -t `random` {} \;

################################################################################
[root@anuppc-01 ~]# wget --header "Cookie: oraclelicense=accept-securebackup-cookie" http://download.oracle.com/otn-pub/java/jdk/8u5-b13/jdk-8u5-linux-x64.tar.gz --no-check-certificate
--2014-05-11 19:37:17--  http://download.oracle.com/otn-pub/java/jdk/8u5-b13/jdk-8u5-linux-x64.tar.gz
Resolving download.oracle.com... 23.67.251.57, 23.67.251.50
Connecting to download.oracle.com|23.67.251.57|:80... connected.
HTTP request sent, awaiting response... 302 Moved Temporarily
Location: https://edelivery.oracle.com/otn-pub/java/jdk/8u5-b13/jdk-8u5-linux-x64.tar.gz [following]
--2014-05-11 19:37:17--  https://edelivery.oracle.com/otn-pub/java/jdk/8u5-b13/jdk-8u5-linux-x64.tar.gz
Resolving edelivery.oracle.com... 23.45.38.140
Connecting to edelivery.oracle.com|23.45.38.140|:443... connected.
WARNING: certificate common name `www.oracle.com' doesn't match requested host name `edelivery.oracle.com'.
HTTP request sent, awaiting response... 302 Moved Temporarily
Location: http://download.oracle.com/otn-pub/java/jdk/8u5-b13/jdk-8u5-linux-x64.tar.gz?AuthParam=1399837157_13a216ce71be82d57322314c7d258f1a [following]
--2014-05-11 19:37:17--  http://download.oracle.com/otn-pub/java/jdk/8u5-b13/jdk-8u5-linux-x64.tar.gz?AuthParam=1399837157_13a216ce71be82d57322314c7d258f1a
Reusing existing connection to download.oracle.com:80.
HTTP request sent, awaiting response... 200 OK
Length: 159008252 (152M) [application/x-gzip]
Saving to: `jdk-8u5-linux-x64.tar.gz?AuthParam=1399837157_13a216ce71be82d57322314c7d258f1a'

100%[======================================================================================================>] 159,008,252 18.4M/s   in 14s

2014-05-11 19:37:31 (10.7 MB/s) - `jdk-8u5-linux-x64.tar.gz?AuthParam=1399837157_13a216ce71be82d57322314c7d258f1a' saved [159008252/159008252]

[root@anuppc-01 ~]#
#################################################################################


Monday, May 4, 2009

Git for Windows with TortoiseGit and GitHub

For this project, we are required to use Git for version control and host code on GitHub. As a person who has always preferred SVN (for its linear/incremental nature), and have only had experience with Google Code and SourceForge, setting up a new GitHub repo was a new experience. And so, for future reference, I document the process here. In this article, we will install msysgit and TortoiseGit and host code on GitHub.

Installing TortoiseGit:

http://code.google.com/p/tortoisegit/ (yes, its hosted on Google Code) TortoiseGit is a shell extension for Windows Explorer that allows for easy management of Git projects. Its a port of the popular TortoiseSVN project, but for Git. First step would be installing Git for Windows (msysgit), which will also give you a nice, simplistic bash shell that you can work with (and execute the above commands just like on Linux if you'd prefer that over TortoiseGit). I personally just downloaded and installed Git 1.7.9 with all default settings. Next was installing TortoiseGit itself, which should autodetect the installed Git setup (though you can configure it later if you haven't) and add itself to the Windows Explorer right-click context menu.

Generating your public key:

To associate your computer with GitHub, you will need a "public key/private key" pair. You could do this entire process manually with the bash shell, but TortoiseGit gives you a handy GUI tool for it: Puttygen (PuTTY Key Generator). Run Puttygen via your Start menu: "Start -> Programs -> TortoiseGit -> Puttygen". Click "Generate", move your mouse around the blank box for a bit, and wait for the box to fill with your newly generated key. Copy the entire text in the box (right-click -> Select All, right-click -> Copy). This is your public key. Then click "Save private key" and choose a safe place to store the .pkk file (e.g. "TortoiseGit.ppk"), passphrase optional. This file stores your private key.

Adding your private key to TortoiseGit:

Next you want make your private key accessible to TortoiseGit for authenticating with GitHub. For this, we'll manage our key list with Pageant: "Start -> TortoiseGit -> Pageant". This will add an icon to your taskbar (see picture below). Right click the icon and select "View Keys". Click "Add Keys" and navigate to your previously saved PuTTY key that is storing your private key file (e.g. "D:\Development\Sandbox\TortoiseGit.ppk"). If added properly, you should see the new key added to the list.

Registering for GitHub:

https://github.com/signup/free
GitHub is a project hosting website that focuses mainly on Git. As of the moment, they offer free public repositories and unlimited public collaborators for open source projects. Registration is pretty straightforward - just sign up for a free personal account.

Adding your public key to GitHub:

https://github.com/settings/ssh
Go to your "Account Settings" on GitHub and go to the "SSH Keys" section. Click "Add SSH key" and paste your public key into the box. Give the key a descriptive title (it doesn't really matter) and then click "Add key". After confirming your GitHub password, you should see the new key added to your "SSH Keys" list.

Creating a GitHub repository:

https://github.com/repositories/new Go to your GitHub profile page (click your username on the top right) and click "New repository". Proceed to fill out the project information. Note that the "Project Name" becomes the repos name, so you may want to use a clean, space-less name (e.g. "PlanmanupNewGITProject" for this project). After clicking "Create repository", you'll be presented with a list of commands to execute to create your first commit. Since we'll be using TortoiseGit instead of a command-line to manage files, you can ignore

Creating your local repo

Now that the project has been created on GitHub, its time to create it on your computer! The GitHub page will give you bash commands for creating the new repos, but we'll use TortoiseGit instead. Navigate to the folder/drive where you want your code to be stored (e.g. "D:\Development\Sandbox"). In that folder, right click to open up the Windows Explorer context menu and select "Git clone...". In the popup box, copy-paste the Git repo URL from GitHub (see above picture) and click "OK". Since you've already set up the authentication earlier and its an empty repository, it should be quick (the log will warn you about cloning an empty repo though). If a new folder has been created with the name of your project (e.g. "D:\Development\Sandbox\PlanmanupNewGITProject"), the clone was successful!

Push files/changes to your local branch

What you have now is a clone of a branch of your repository. Your current branch is probably the master branch assuming you just created a clean project. Go ahead and add files and your code to the folder. Once you're happy with your code/changes, it's time to commit these changes. You can do so by right clicking to open up the context menu in the clone's folder and selecting "Git Commit -> "master"...". This will open up a window that will allow you to add the change message and select what changes you want to commit. If its your first commit, you will want to check the "Select/Deselect All" checkbox to add all your new files. Click "OK" when you're happy to commit the changes to your branch. Note that unlike SVN, this commit is LOCAL ONLY!

Synchronizing changes with GitHub

After a few commits, you might want to push your changes to GitHub. Open up the context menu in the clone's folder and selecting "TortoiseGit -> Push". In the new window, if you also added tags, don't forget to check the "Include Tags" checkbox before clicking "OK". If other project collaborators pushed out changes, you can pull their changes from GitHub with "TortoiseGit -> Pull".

Associating your private key with the git repos

To avoid having to manually start up the Pageant daemon every time you want to sync your git repos with GitHub, you can add your PuTTY key to TortoiseGit's Remote settings. Open up the context menu in the clone's folder and selecting "TortoiseGit -> Settings". In the new window, select "Git -> Remote" and select your Remote item (in my case, "origin"). Locate and select the .ppk file from earlier for the "Putty Key" field and click "OK". Now you don't have to manually start up Pageant every time you reboot your computer!

You're done! and that's it! If you check your GitHub project page, you should see your latest commits and navigate your code's different branches and tags.